How to pack a hiking backpack diagram: Step-by-step visual guide

Pack a hiking backpack in 3 zones: heavy gear close to your back and between shoulder blades, medium gear around it, light gear on top and outside. Poor packing shifts weight, slows balance, and makes you dig for essentials on the trail. This guide gives a simple visual zone diagram, a packing order for day hikes to multi-day trips, and a quick troubleshooting checklist.
Hiking backpack packing diagram
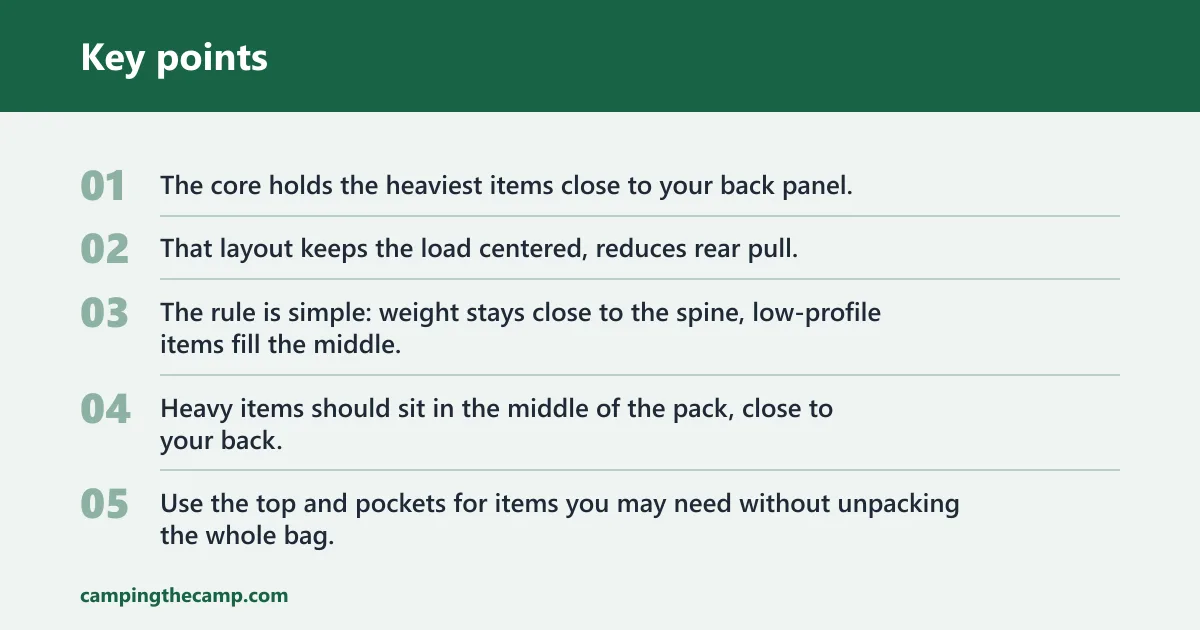
Think of the pack as three vertical zones. The bottom holds light, bulky items. The core holds the heaviest items close to your back panel. The top holds things you may need sooner. That layout keeps the load centered, reduces rear pull, and makes your pack easier to move with.
Three-zone layout
The rule is simple: weight stays close to the spine, low-profile items fill the middle, and quick-access gear stays near the top or outside the main bag. Heavy items should sit in the middle of the pack, close to your back. Light, bulky gear belongs lower down.
| Zone | What goes there | Access priority | What it controls |
|---|---|---|---|
| Bottom | Sleeping bag, sleep clothes, camp shoes, sleeping pad if stored inside | Low | Bulky cushioning, low-access storage |
| Core | Food, water reservoir or bottles, stove, cooking kit, bear canister, other heavy items | Medium | Stability, body mechanics, weight transfer |
| Top | Rain jacket, insulating layer, water filter, toilet kit, first-aid access items | High | Fast access, weather response, trail management |
Where access matters most
Use the top and pockets for items you may need without unpacking the whole bag. Put the heaviest load in the core so the pack rides closer to your body instead of pulling backward. Keep bulky but low-priority items at the bottom so they do not crowd the center.
What goes in the bottom zone?
The bottom zone is usually for lighter, bulkier items, such as the sleeping bag, sleep clothes, and camp shoes. If you store a sleeping pad inside the pack, it can also go low as long as it does not block the core. This zone should generally not carry hard or dense gear.
Sleeping bag and sleep layer placement
Pack the sleeping bag first if you want it to fill the bottom compartment and create a soft base. Sleep clothes can go with it in a separate dry bag or pouch. That keeps bedding together and leaves the core open for denser items.
Camp shoes and sleeping pad inside the pack
Camp shoes fit well at the bottom because they are light but bulky. A sleeping pad can also go there when it is stored inside the pack, especially if it is flexible and forms the base layer. Keep it from pressing into the center load.
A common first-timer mistake is putting a pot, fuel canister, or stove in the bottom because the space looks empty. That pushes weight too low and makes the pack feel hollow in the middle while the upper load wanders around.
What to avoid at the bottom
Avoid fragile items, food you need soon, and anything dense enough to sink the pack’s balance. The bottom should not become a catchall. If you bury frequently used gear there, you will have to unpack half the bag on trail breaks.
What belongs in the core zone?
The core zone holds the heaviest items, usually centered close to the back panel and spine. This is where food, water, stove, cooking kit, and a bear canister belong. The goal is stable mass, not loose packing or front-heavy stacking.
Heavy gear close to the back panel
Keep heavy items inside the backpack’s core so the load stays close to your back. That placement reduces strain on your shoulders and helps the pack move with your body. If the weight drifts away from the back panel, the pack feels like it wants to pull you backward.
Food, water, stove, and cooking kit
Food belongs in the core because it is dense and usually packed in a compact shape. Water, whether in a reservoir or bottles, also belongs there when possible. Stove parts and the cooking kit fill gaps around the load instead of creating empty spaces that let gear slide.
Bear canister placement and balance
If you carry a bear canister, place it in the core where the pack can help support its shape. It is hard, heavy, and awkward enough that it can ruin the balance if shoved too high or too low. Center it so the rest of the load wraps around it evenly.
For example, a roughly 60-liter pack may carry about three days of food, a stove, and a bear canister. If the canister rides high near the top, the pack can feel top-heavy and sway on uneven ground. If it sits low and centered, the weight is easier to control.
What goes in the top zone?
The top zone is often for items needed sooner, such as a rain jacket, insulating layer, water filter, toilet kit, and quick first-aid access. It is also a good place for soft layers that can fill the remaining space after the core is packed. Keep this zone useful, not overloaded.
Rain gear and insulating layer access
Put rain gear near the top so you can reach it fast when weather changes. An insulating layer belongs there too, since temperatures can drop during breaks or after sunset. These items should be easy to reach without dumping the rest of the pack.
Toilet kit, first aid, and water filter
A toilet kit belongs near the top because it may be needed with little warning. The same goes for first aid access items and a water filter. These are not the heaviest items, but they are among the most likely to be used during the day.
Top-heavy packing mistakes
Do not load the top with dense gear just because there is room. That creates a top-heavy pack that feels unstable when you bend, step up, or turn. It can also crush soft gear below it and make the pack feel stiff instead of controlled.
Picture a beginner day pack with a rain shell, snacks, and a filter at the top, then a sleeping bag, food, and stove buried underneath. The shell is easy to reach, but the heavy items are too low and too scattered, so the pack swings more on the trail.
Pack pockets and outside gear
Pockets are for quick-grab items, not for random overflow. Use the lid or top pockets for snacks, map, phone, sunscreen, headlamp, and first aid. Side pockets are useful for water bottles. Hip belt pockets are for tiny essentials you want while moving.
Hip belt pockets
The hip belt should sit on your hip bones and carry most of the weight. Hip belt pockets are for tiny necessities such as snacks, phone, and lip balm. They let you reach small items without taking the pack off.
Side pockets and front stash space
External pockets can hold sunscreen, bug repellant, and a headlamp. Side pockets are also a practical place for water bottles if your pack is made for them. Keep these pockets light so they do not pull the pack off balance.
When to keep items outside the main bag
Keep items outside only if they are light, durable, and useful at short notice. A map, phone, or snack pouch fits that rule. Hard gear, food blocks, and anything that can shift should stay inside the main body of the pack.
How to pack a hiking backpack so it stays balanced
Pack from the inside out: liner first, core next, top last, then pockets and straps. Keep weight centered close to the back panel. Balance comes from shape as much as from mass, so fill voids and keep similar volume on both sides of the core.
Start with a liner or dry bag
Use a pack liner or rubbish bag as the first step before loading. It helps keep contents dry when rain, brush, or wet ground reaches the pack. It also makes it easier to slide soft items down into the pack without snagging them.
Load the core before the top
Place dense gear in the core first, then build around it with softer items. That lets you lock the center of gravity in place before adding easier-to-reach layers. If the core is loose, the top will settle badly during the day.
Tighten compression straps last
Compression straps are for stabilizing shifting load and reducing bounce. Tighten them after packing, once the load is settled. They help compact loose space so the contents do not drift when you move over uneven ground.
How to stop gear from shifting inside your pack
Fill empty spaces with soft items, then tighten the compression straps. Keep hard objects close to the back panel, where they are less likely to move. If the pack still sways, the load is probably too high, too far back, or too loose inside.
How do I stop gear from shifting inside my pack?
Stop shifting by packing dense gear tightly in the core, filling gaps with soft items, and using compression straps after the load is set. If the pack bounces, something inside has room to move. If the shoulders ache, the weight may be too far from your back panel.
Load lifters and shoulder-strap angle
Load lifters should sit at about 45 degrees. Their job is to pull the load closer to your body and improve stability. If they are too flat or too steep, they do less to control the upper part of the pack.
Hip belt fit check
The hip belt should sit on your hip bones and carry most of the weight. If it rides too high, your shoulders take more load than they should. If it sits too low, the pack can slip and rub during movement.
Troubleshooting checklist
- If the pack feels top-heavy, move dense items down into the core and shift soft gear to the top.
- If the pack pulls backward, bring heavy items closer to the back panel.
- If gear shifts side to side, fill empty gaps and tighten compression straps.
- If your shoulders hurt early, reset the hip belt so it sits on the hip bones.
- If the pack bounces, check the load lifter angle and snug the upper straps.
- If fragile gear is crushed, move hard objects away from it and separate them with soft layers.
Packing matrix by trip type
This matrix shows a single visual system for day hikes, overnight trips, and multi-day trips. The zone rule does not change. What changes is how much gear you carry and how urgently you need to reach it. Use the same layout every time, then scale volume up or down.
| Trip type | Item type | Exact zone | Reason to place it there | Common mistake if placed elsewhere |
|---|---|---|---|---|
| Day hike | Snacks, phone, lip balm | Hip belt pockets | High access while moving | You stop often to dig in the main bag |
| Day hike | Rain jacket, water filter, first aid | Top zone | Quick response to weather or small problems | You unpack the whole bag for a short stop |
| Day hike | Water, lunch, extra layer | Core zone | Keeps weight close to your back in a 20–30-liter day pack | The pack pulls away from your body |
| Overnight trip | Sleeping bag, sleep clothes, camp shoes | Bottom zone | Lightest and bulkiest items fit below the core | The core loses space and the pack becomes top-heavy |
| Overnight trip | Food, stove, cooking kit, water reservoir | Core zone | Heavy items stay centered close to the back | Weight drifts outward and causes rear pull |
| Overnight trip | Rain jacket, insulating layer, toilet kit | Top zone | Needed sooner than sleep gear | They get buried under sleeping gear |
| Multi-day trip | Bear canister | Core zone | Hard, heavy load stays centered in a 40–70-liter pack | The pack tips backward or sits awkwardly high |
| Multi-day trip | Water bottles, snacks, sunscreen | External pockets | Useful items stay easy to reach between breaks | You open the main compartment too often |
| Multi-day trip | Map, phone, headlamp | Hip belt pockets or lid | Fast access in changing light or on route-finding breaks | Small items get buried and delayed when needed |
Day hike, overnight, and multi-day rules
A 20–30-liter day pack is suitable for day hikes, so the system is simpler: water, snacks, rain gear, and light layers take priority. A 40–70-liter pack is a good option for one or more days, which gives the bottom zone more room for sleep gear and the core more room for food and shelter weight.
How to pack a backpack to keep things dry
Use a pack liner or rubbish bag before loading anything else. That is the first step for weather protection. Then place gear into dry bags or compartments as needed, with the most moisture-sensitive items protected before they reach the core or bottom.
Hydration bladder placement
A hydration bladder with a tube is recommended for convenient access. It should fit the pack’s reservoir sleeve or compatible space, and the tube should route cleanly so you can drink without opening the bag. If the pack is not designed for it, use bottles instead.
Keep damp items from spreading moisture
Put wet rain gear in a separate section or bag if you must stow it after use. Do not press damp layers against sleep clothes or insulation. A liner helps, but separation matters too when you want dry items to stay dry through the whole hike.
How do I pack a hiking backpack in the right order?
Pack in this order: liner first, bottom zone next, core after that, top zone after the core, then pockets, straps, and fit checks. This order keeps the load stable while still leaving your most-needed items easy to reach.
- Place the pack liner or rubbish bag inside the main compartment.
- Load the bottom zone with the sleeping bag, sleep clothes, camp shoes, and sleeping pad if it stays inside the pack.
- Set the heaviest items in the core, close to your back panel.
- Add food, water, stove, cooking kit, and any hard load like a bear canister.
- Place rain gear, an insulating layer, water filter, and toilet kit near the top.
- Fill external pockets with quick-grab items only.
- Stow tiny essentials in the hip belt pockets.
- Tighten compression straps, then check the hip belt and load lifters.
Frequently asked questions
Where should heavy items go in a hiking backpack?
Heavy items should go in the middle of the pack, close to your back. That placement keeps the load centered and easier to control. If the weight sits too far away from the back panel, the pack pulls backward and can tire your shoulders faster.
What goes in the bottom, middle, and top of a backpack?
The bottom zone holds the sleeping bag, sleep clothes, camp shoes, and sometimes a sleeping pad. The middle, or core, holds heavy items like food, water, stove, cooking kit, and a bear canister. The top holds rain gear, an insulating layer, a water filter, and a toilet kit.
How do I pack a hiking backpack so it stays balanced?
Keep dense gear close to the back panel, fill the core first, and use the top for lighter items that need quick access. Then tighten compression straps to remove slack. A balanced pack feels centered over your hips, not like it is dragging you backward.
What should go in hip belt pockets and lid pockets?
Hip belt pockets are best for tiny essentials such as phone, snacks, and lip balm. Lid pockets can hold snacks, a map, a phone, sunscreen, a headlamp, and small first aid items. Keep these pockets light so they stay easy to reach and do not distort the pack’s shape.
How do I pack a backpack to keep things dry?
Start with a pack liner or rubbish bag inside the main compartment. Then place gear into the liner and use dry bags for items that should stay especially dry. Keep wet gear separate from sleep gear and insulation so moisture does not spread through the pack.
Do sleeping bag and sleeping pad go at the bottom of the pack?
Yes, the sleeping bag belongs at the bottom, and a sleeping pad can go there too if it is stored inside the pack. Both are light and bulky, which makes them useful as a base layer. Just keep them below the core so they do not interfere with the heaviest gear.