
How to clean a camp stove step-by-step

To clean a camp stove, disconnect fuel, wait until the burners, grate, and case are cool enough to touch with bare hands, wash removable parts in warm water with a few drops of dish soap, wipe the body, and clean burner ports or jets only with the size tool the maker specifies. Done badly, you can clog a jet, damage seals, start rust, or create a leak that makes the next startup unsafe. This guide covers routine cleaning, deeper burner and jet work, storage prep, rust prevention, and post-clean checks by stove type.
The safest workflow is parts first. Remove grates, drip trays, and cooktops before scrubbing the stove body, then handle burners, ports, jets, valves, and storage prep as separate jobs. That matters because greasy steel, coated panels, aluminum burner parts, and fuel-system components do not all tolerate the same cleaner or the same amount of water.
What should you do before cleaning a camp stove?
Before cleaning a camp stove, shut it down the right way for its fuel type, wait until all metal parts are fully cool, disconnect the fuel source, and brush or shake out crumbs, ash, and loose soot before any washing starts. That order prevents trapped pressure, wet fuel parts, bent burner pieces, and grit getting pushed into ports or the jet opening.
Safe shutdown by stove type
Propane and butane stoves should usually be turned off at the burner controls, then disconnected from the cylinder or canister only after the flame is out and the stove is cool. On a hose-fed propane stove, close the cylinder valve first if the maker directs that sequence, then let the line clear as the flame dies.
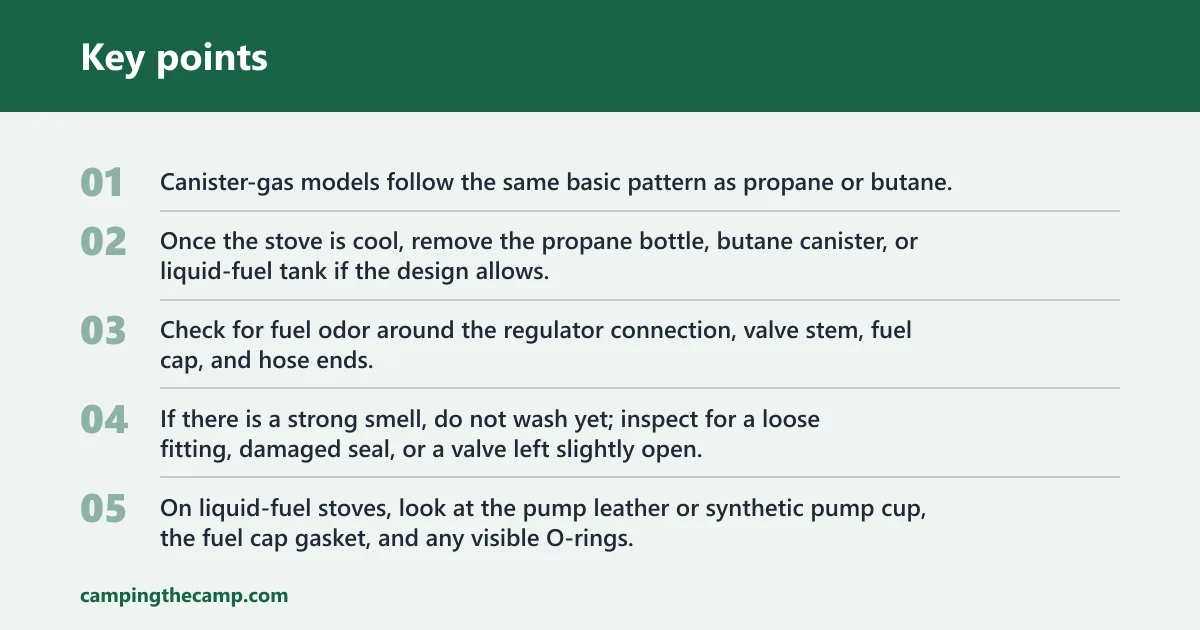
Canister-gas models follow the same basic pattern as propane or butane. Liquid-fuel models need more care: turn the control off, let the burner cool, release pressure only as the manual allows, and generally keep the pump, fuel cap, and generator area dry during cleaning.
Fuel disconnection and residual-fuel checks
Once the stove is cool, remove the propane bottle, butane canister, or liquid-fuel tank if the design allows. Check for fuel odor around the regulator connection, valve stem, fuel cap, and hose ends. If there is a strong smell, do not wash yet; inspect for a loose fitting, damaged seal, or a valve left slightly open.
On liquid-fuel stoves, look at the pump leather or synthetic pump cup, the fuel cap gasket, and any visible O-rings. Wet cleaning around those parts can swell seals, trap moisture, and later cause pressure loss.
What to remove before any washing
Lift off grates, removable cooktops, drip trays, burner caps, and burner heads if the manual shows them as serviceable parts. Brush away dry crumbs and soot outdoors or over a trash bag first. That keeps grease slurry from carrying grit into the burner ports.
A common first-timer mistake is scrubbing a two-burner propane stove with the grate still installed, which pushes greasy crumbs straight into the rear burner row. The stove looks cleaner, then one side lights with a weak orange flame because several ports were packed during washing.
What you’ll need
Cleaning tools and mild cleaners
- Microfiber or other soft cloths
- Warm water and mild dish soap
- Nylon brush or an old toothbrush
- Cotton swabs
- Pipe cleaners for burner tubes where the maker allows access
- Dedicated burner-port cleaning tool only if the maker specifies one
- Baking soda for a mild paste on cooked-on grease
- A small bowl or tub for soaking grates and drip trays
Items to keep away from most camp stoves
- Steel wool and aggressive scouring pads should generally not be used on coated or painted steel.
- Oven cleaner, bleach, caustic degreasers, and strong solvents
- Knives, drill bits, hard wire, or metal needles in jets and orifices
- Spray cleaner directly into regulators, valves, igniters, pumps, or fuel connections
How do you clean a camp stove step by step?
Clean a camp stove in a fixed order: shut down, cool, disconnect fuel, clear out crumbs and soot, wash removable greasy parts, wipe the body, clear burner deposits carefully, dry everything fully, then reassemble and test. That order cuts the most common after-clean failures: weak flame, clicking without ignition, rust, and fuel odor.
Parts-first cleaning workflow
- Shut down safely. Turn all burner controls off, close the fuel source if the stove uses a cylinder or tank valve, and wait until every burner part is cool to the touch. Cleaning a warm stove can bake cleaner residue onto finishes and can pull water into hot burner parts.
- Disconnect the fuel. Remove the propane bottle, hose regulator assembly, butane canister, or liquid-fuel tank as the design allows. Keep regulators, valves, pumps, and fuel caps out of wash water because trapped moisture there often causes the next ignition or pressure problem.
- Remove loose debris. Tip out crumbs, ash, and flaky soot, or loosen them with a dry nylon brush before using any liquid cleaner. Brush around burner heads and under grates so debris leaves the stove instead of turning into sludge.
- Take off removable parts. Lift out grates, drip trays, burner caps, and removable cooktops. Set small parts down in reassembly order so burner caps, cups, and alignment tabs return to the same positions later.
- Soak greasy steel parts. Wash grates and drip trays in warm water with mild dish soap for a few minutes, then scrub with a nylon brush or soft sponge. If grease is baked on, use a baking soda paste and wipe it off fully so no powder remains to fall into burners later.
- Wipe the stove body. Use a damp microfiber cloth with mild dish soap solution on painted, enameled, or coated panels. Rinse the cloth often and avoid flooding seams, igniters, valve stems, and burner openings.
- Clean burner surfaces gently. Brush carbon and grease from burner heads, burner cups, and exposed ports with a dry or lightly damp nylon brush. Use cotton swabs for edges and a pipe cleaner only where the burner tube is accessible and the maker allows it.
- Clear ports or jets carefully. If ports are visibly clogged, use only the cleaning method or tool the manufacturer specifies, and do not enlarge the opening. For jets or orifices, follow the manual; many should be brushed or blown clear rather than probed with anything hard.
- Dry every part fully. Towel-dry first, then leave parts apart until hidden seams, burner cups, and drip trays are fully dry. This step matters most on bare steel edges, under coated grates, and around liquid-fuel burner tubes where trapped moisture invites rust or misfire.
- Reassemble and test. Put burner caps, grates, and cooktops back in their exact positions, reconnect fuel, and check fittings for leaks where relevant under the maker’s instructions, using a soapy-water test where the manufacturer allows it. Light the stove outdoors and confirm even flame, normal ignition, and no fuel smell.
How to clean a Coleman stove without damaging parts
If you need to clean a Coleman two-burner propane stove, the key is using mild soap, warm water, and gentle tools while keeping water away from burners, valves, and igniter parts. The Coleman stove cleaning guide explains how to handle the cooktop, grates, drip tray, and fuel-side components without stripping the finish or clogging burner ports. That matters because the wrong cleaner or too much moisture can cause yellow flames, hard starts, or damaged seals.
This section is especially useful after grease splatter or a boil-over, when you want a safe cleanup routine that protects both performance and the stove’s longevity.
Stove cleaning matrix
Type-specific cleaning notes
| Stove type | Removable parts | Safe cleaners | No-go cleaners | Burner-clog risk | Drying priority | Post-clean test steps |
|---|---|---|---|---|---|---|
| Propane single-burner | Grate, burner cap, drip tray if fitted | Warm water, mild dish soap, baking soda paste on grease | Oven cleaner, bleach, abrasive pads on coated steel | Medium at ports and jet/orifice under burner head | High around burner cup and regulator connection area | Reconnect bottle, leak-check per instructions, light on low then high, confirm even blue flame |
| Propane multi-burner suitcase style | Grates, cooktop panels, drip tray, burner caps on some models | Warm water, mild dish soap, limited baking soda paste | Harsh degreasers on paint or enamel, soaking igniter parts | High because crumbs collect near rear and crossover ports | High under cooktop and around manifold openings | Reconnect hose and regulator, leak-check joints, light each burner separately, verify crossover ignition and equal flame rows |
| Butane tabletop | Grate, drip tray, burner cap | Mild dish soap, soft cloth, careful cotton-swab cleaning near canister bay | Flooding the canister latch area, abrasives on enamel top | Medium at low-pressure burner ports | Very high at canister connection point and valve area | Install canister, confirm lock engages, light burner, watch for steady flame at low setting and no gas odor |
| Dual-fuel canister-gas model | Grate, burner cap, pot supports depending on design | Mild dish soap, nylon brush, cotton swabs | Strong solvents on seals, soaking control valve area | Medium to high if soot flakes enter jet | High around valve stem and burner tube | Reconnect fuel, inspect valve action, light at low output, then check full output for stable flame |
| Coleman-style liquid-fuel | Grates, burner rings or caps where removable, tank if detachable | Soft cloth, mild dish soap on exterior parts only, dry brushing near generator and pump | Soaking pump, fuel cap, generator, harsh chemicals on seals or paint | High in burner tubes and jet/generator area | Critical around pump, cap gasket, burner box seams, and tubes | Reinstall tank, pressurize per instructions, inspect for fuel odor, light outdoors, confirm normal startup and full flame after warmup |
| Camp Chef-style freestanding propane | Large grates, drip tray, grease cup, burner cups or heads | Warm water, mild dish soap, baking soda paste on grease trays | Pressure washing, abrasives on powder coat, soaking igniter leads | Medium at burner heads, high if grease runs into ports | Critical under burner tray, grease channel, and frame corners | Reconnect tank and regulator, leak-check hose joints, light each burner, confirm no yellow lazy flame and no grease smoke from hidden residue |
How do you clean each stove type safely?
Each stove type needs a different cleanup path because residue lands in different places and the fuel hardware reacts differently to water. Propane models collect grease around grates and ports, butane units need extra care at the canister bay, and liquid-fuel stoves need drier, more targeted cleaning around pumps, caps, and generator parts.
Propane camp stoves
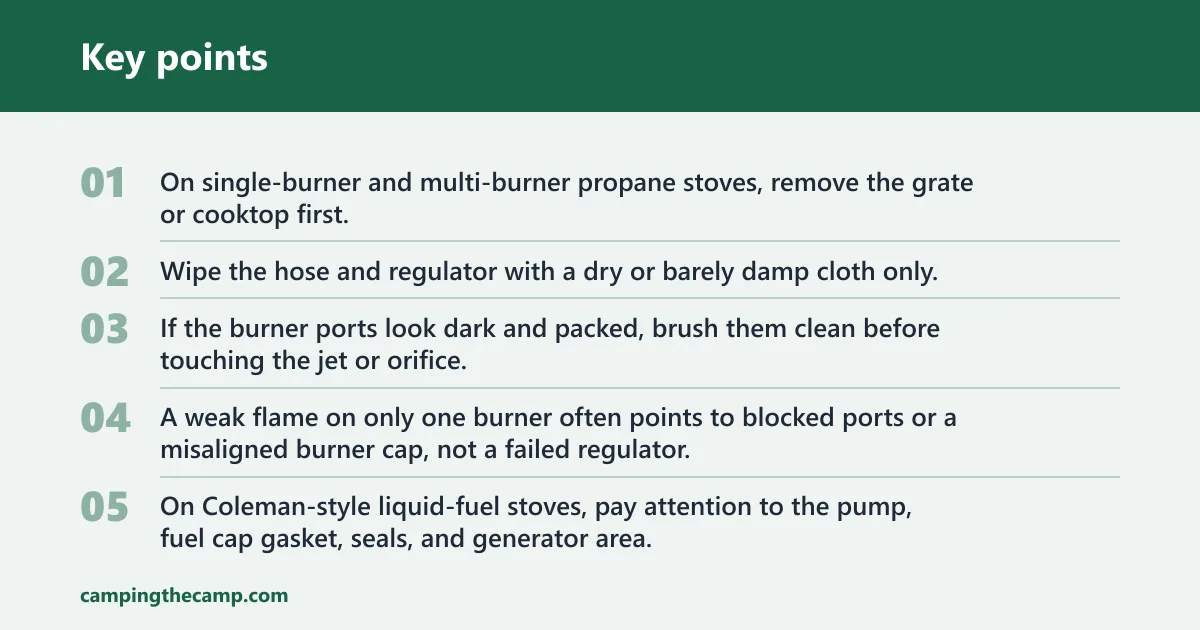
On single-burner and multi-burner propane stoves, remove the grate or cooktop first. Grease usually collects at the front lip, on drip trays, and around burner bowls; soot appears more often on the underside of cookware supports and around windscreen edges when pans run oversized or flames are turned too high.
Wipe the hose and regulator with a dry or barely damp cloth only. Do not submerge them. If the burner ports look dark and packed, brush them clean before touching the jet or orifice. A weak flame on only one burner often points to blocked ports or a misaligned burner cap, not a failed regulator.
Butane camp stoves
Butane tabletop stoves often show a lighter soot pattern than propane, but the canister connection point deserves more caution. Clean the grate, top plate, and burner cap with mild soap, then use cotton swabs around the canister bay and latch area without dripping water into the valve or lock mechanism.
Because butane burners operate at lower pressure, even light residue at the burner cap or ports can distort the flame ring. If ignition clicks but the flame does not spread evenly, check cap alignment and port blockage before assuming the canister is bad.
Dual-fuel and Coleman-style liquid-fuel stoves
Canister-gas models clean much like propane stoves, but liquid-fuel models need a sharper divide between washable exterior parts and dry-clean-only fuel parts. Remove grates and loose burner pieces for washing, then clean burner tubes, jet areas, the pump, and the fuel cap area with brushes and cloths rather than soaking.
On Coleman-style liquid-fuel stoves, pay attention to the pump, fuel cap gasket, seals, and generator area. Grease and soot can collect around the burner rings and tubes, but water should not sit around the pump shaft or cap threads. If the stove has old chipped paint or bare steel inside the case, dry it immediately after wiping.
Suppose a liquid-fuel suitcase stove was packed away with a half-full tank and sticky brown residue around the main burner. Clean the case and grates normally, but keep wash water away from the tank fittings, then inspect the cap gasket and generator-area deposits before the next startup.
Camp Chef-style freestanding stoves
Large freestanding propane stoves usually need the heaviest grease cleanup. Remove big cast or coated grates, empty the grease cup, slide out the drip tray if present, and clean the cooktop surface before touching the burners. Grease channels and tray rails often hide the residue that later smokes on the next cook.
Burner cups or heads on these stoves should be brushed, not flooded. Full dry-down matters because frame corners, tray supports, and underside seams hold water longer than tabletop stoves. If grease has baked onto powder-coated legs or shelves, use mild soap first and a baking soda paste only on the residue itself.
How do you clean burners and jets without damage?
Clean burners and jets with the least aggressive method that clears the obstruction. Brush burner heads and ports first, keep water out of valves and regulators, and treat a true jet blockage as a precision-cleaning job because enlarging the opening can permanently change flame shape and fuel flow.
Burner heads and clogged ports
Burner heads clog with carbon, grease, and food splash. Start with a dry nylon brush or old toothbrush, then use a cotton swab for edges. If the maker specifies a port-cleaning tool or method, use only that to clear individual ports.
Partial port blockage usually shows as an uneven flame ring, small dead spots, or flame lifting on one side. Fully blocked ports can prevent flame spread even when ignition works. After cleaning, make sure burner caps and heads sit flat on their locator tabs; poor alignment can mimic a clog.
Orifices and jets
The orifice or jet has a tiny fuel opening and is easier to damage than a burner port. Dirt, grease residue, corrosion flakes, or fragments from old thread sealant can block it. Symptoms often include weak flame on all settings, sputtering, delayed ignition, or one burner staying much weaker than the others.
Use only the cleaning method the maker specifies. Many stoves call for air, a soft brush, or a service tool sized for that jet. Avoid hard wire, drill bits, and needles because even slight enlargement changes fuel delivery and can create yellow flame, flare-up, or overfiring.
Valves, regulators, pumps, and seals
These parts are usually wipe-clean only. A fuel control valve can be cleaned around the stem with a cloth or cotton swab, but cleaner should not be sprayed into it. Regulators and hose fittings should stay dry except for surface wiping, and pump assemblies on liquid-fuel stoves should never be soaked.
Picture a butane stove that clicks strongly after cleaning but will not light, while a faint gas smell appears near the canister bay. Check whether moisture reached the valve area or whether a cotton fiber is caught near the connection point before taking the burner apart again.
What should you use for grease, soot, and stuck-on residue?
Use mild dish soap for routine grease, a baking soda paste for cooked-on residue, and vinegar only in limited spots where the finish and metal can tolerate it. The goal is to remove grease and soot without leaving cleaner residue in burner parts or stripping paint, enamel, aluminum, or seals.
Mild dish soap for routine cleanup
Warm water with mild dish soap is the default cleaner for grates, drip trays, cooktops, and painted or enameled body panels. It cuts cooking grease well enough for most camp stove messes, and it rinses away more cleanly than heavy kitchen degreasers.
Baking soda paste for cooked-on grease
Mix baking soda with a small amount of water into a spreadable paste. Apply it to greasy grates, drip trays, or stubborn spots on removable steel parts, let it sit briefly, then scrub with a nylon brush and rinse thoroughly. Keep the paste out of burner ports, jets, and valve openings.
When vinegar is acceptable and when it is not
Vinegar can help loosen mineral film or light residue on some enameled steel or stainless steel surfaces, but use it sparingly and rinse it off fully. It is a poor choice around bare steel, cast iron, aluminum parts, damaged coatings, and any place where acid could sit in seams and speed corrosion.
Do not treat vinegar as universal. If the stove has powder coat, chipped paint, exposed steel, cast-iron parts, or soft metal burner pieces, mild soap is the safer first choice.
Cleaners and tools to avoid on stove finishes
Skip oven cleaner, bleach, caustic degreasers, and strong solvents unless the manufacturer explicitly approves them for that exact finish. They can dull enamel, strip paint, stain aluminum, harden seals, and remove protective coatings. Steel wool and aggressive pads can also expose bare steel that starts rusting after the next wash.
How do you prevent rust and store the stove for winter?
Prevent rust by drying the stove longer than feels necessary, checking chipped paint and bare steel, and storing it clean and fuel-safe in a cool, dry place. Winter storage should be treated as a separate workflow because old grease, trapped water, and leftover fuel create spring startup problems.
Drying priorities after washing
Dry drip trays, grate undersides, burner cups, case seams, and any folded edges first. Those spots hold water after the visible surfaces look dry. Hand-dry with a cloth, then leave the stove open or disassembled until moisture is gone from hidden corners.
Where the finish is already chipped, a very light protective film may be appropriate on bare steel storage surfaces if the manufacturer allows it, but keep any protective product away from burner ports, jets, valves, and igniters.
Rust-prone spots to inspect
Look for rust at grate welds, tray corners, chipped case edges, screw heads, and the underside of freestanding stove shelves. On suitcase-style stoves, the case bottom and hinge area deserve a close look. On Camp Chef-style frames, inspect tray rails, leg joints, and grease-channel edges.
Seasonal storage by fuel type
- Deep-clean the stove. Remove grease, soot, and crumbs before storage so residue does not harden over winter or hold moisture against steel. This is the time to clean drip trays, burner tops, and case corners more thoroughly than after a normal trip.
- Remove or disconnect fuel. Detach propane bottles and butane canisters, and follow the manual for liquid-fuel tank storage and fuel removal. Check that valves are fully off and confirm there is no lingering fuel odor before packing the stove away.
- Inspect wear points. Look at hose ends, regulators, canister latches, pump parts, fuel caps, and visible seals for cracks or flattening. Winter storage is easier when replacement needs are found before the next trip, not at first light-up.
- Store it dry. Pack the stove only after every washed part is fully dry, then place it in a dry case, tote, or bag. Avoid damp sheds and unsealed ground contact, especially for painted steel cases and freestanding stove frames.
- Test it before use. At the next season’s first setup, reassemble carefully, reconnect fuel, leak-check where relevant with a soapy-water test where the manufacturer allows it, and light outdoors per the maker’s instructions. Watch for weak flame, uneven flame, delayed ignition, clicking without flame, or fuel odor.
What should I not do when cleaning a camp stove?
Do not soak regulators, valves, pumps, igniters, fuel caps, or hose connections; do not force metal tools into jets; and do not assume every finish tolerates strong cleaners. Most post-cleaning problems come from water in fuel parts, enlarged jet openings, misaligned burner caps, or rust started by incomplete drying.
Common mistakes that cause problems later
- Washing the stove body before removing greasy grates and trays
- Pushing crumbs into burner ports during scrubbing
- Leaving baking soda or cleaner residue near burners or jets
- Reassembling while parts are still damp underneath
- Using vinegar broadly on unknown metals or damaged coatings
- Skipping the post-clean flame test after reassembly
Frequently asked questions
What should I clean a camp stove with?
For most camp stoves, use warm water, mild dish soap, a soft cloth, and a nylon brush or old toothbrush. Cotton swabs, pipe cleaners, and a dedicated port-cleaning tool are useful for detail work only where the maker specifies them. Avoid harsh solvents, bleach, oven cleaner, and metal tools in jets.
Can I use vinegar or baking soda on a camp stove?
Yes, but selectively. Baking soda paste works well on cooked-on grease on grates and drip trays. Vinegar can help with light film on some surfaces, but it should be used sparingly and rinsed off fully. Keep both away from jets, valves, seals, bare steel, and finishes that may react badly.
How do I clean clogged camp stove burners safely?
Brush the burner head and ports first with a dry nylon brush, then use cotton swabs and only the port-cleaning method the manufacturer allows. Do not force hard wire into the openings. Reinstall the burner parts carefully, because a crooked cap or head can cause the same uneven flame as a clog.
How do you clean grease off a camp stove?
Take off grates, drip trays, and any removable cooktop pieces first, then soak those parts in warm soapy water and scrub with a nylon brush. Wipe the body separately with a damp cloth. For baked-on grease, use a baking soda paste, then rinse and dry fully to limit residue and rust.
How do you clean a Coleman camp stove?
Clean removable grates and exterior case surfaces with mild soap and water, but keep the pump, fuel cap, generator area, and seals out of soak water. Use dry brushing and careful wiping around burner tubes and jet areas. Before storage, inspect the cap gasket, pump parts, and any chipped paint inside the case.
How do you stop rust on a camp stove after cleaning?
Dry every part completely, including tray corners, burner cups, seam folds, and grate undersides, before reassembly or storage. Inspect for chipped paint or bare steel and protect only those spots as the manufacturer allows. Store the stove in a dry case, tote, or bag, away from damp floors and condensation.