How to choose a hiking backpack: Fit and sizing

Choose a hiking backpack by matching your torso length and hip size first, then your real gear volume: about 20–30 liters for day hikes, about 30–50 for overnight trips, and about 50–70 for many multi-day loads. Get this wrong and shoulder pain, hip bruising, poor balance, and wasted pack space show up fast. This guide covers torso and hip measurement, pack sizing, frame types, load limits, and the features worth paying for.
Measure your body first, then match the pack’s shape and volume to what you actually carry. Torso length matters more than overall height because it sets where the shoulder straps anchor and where the hip belt lands, while belt shape and adjustment range decide whether the padding can wrap over the iliac crest and carry most of the weight.
Why does fit matter more than brand or stated volume?
A pack that matches your torso length, hip shape, and typical load will usually carry better than a bigger-name pack in the wrong size. Stated volume only tells you how much gear might fit. It does not tell you whether the hip belt can bear weight, whether the strap shape follows your shoulders, or whether the load will stay close to your center of gravity.
Why torso length matters more than height
Backpack sizing is built around torso length, not overall height. Two hikers who are the same height can have different torso lengths, which changes where the shoulder straps anchor and where the hip belt lands.
Measure from the C7 vertebra, the bony bump at the base of your neck, down to the line across the top of your iliac crests. That distance is what most manufacturers use to place you into a small, medium, or large torso range.
Why hip-belt contact matters more than pack label size
The hip belt should wrap the iliac crest and carry most of the load. If the belt rides above the crest, slips below it, or runs out of adjustment before it tightens evenly, your shoulders end up carrying weight they should not be carrying.
Many packs offer interchangeable or multiple belt sizes even within one torso size. That matters when torso length points one way and hip circumference points another.
What goes wrong when volume and body fit do not match
A pack can be the right liter size and still carry badly. Common failure cases include lower-back pressure from a short torso, collarbone pressure from a long torso, hip-belt slip from poor belt wrap, and a top-heavy feel from choosing extra volume that gets filled above shoulder level.
If a 38-liter pack fits your torso and hips, it may still be too small when a cold-weather kit plus a bear canister needs closer to about 55 liters. Strapping bulky items high and far back shifts weight outward, which increases sway and makes load lifters less effective.
How do you measure torso length and hip size?
Measure torso length from the C7 vertebra to the iliac crest line, then measure hip circumference where the pack belt will sit over the top of the hips. Use those two numbers together. If they point to different sizes, torso length usually decides the pack body size, while hip measurement decides whether you need a different belt size or a different model.
Measure before you shop
- Find C7. Tilt your head forward and locate the bony bump at the base of your neck. This is the top point for torso measurement, and using the same landmark each time avoids sizing drift.
- Mark the iliac crest line. Put your hands on top of your hip bones and draw an imaginary straight line between the highest points. Ask another person to help if possible, because this line sets the lower torso point.
- Measure torso length. Run a flexible tape from C7 down the spine to the iliac crest line. Compare that number with the manufacturer’s torso chart rather than assuming small, medium, or large mean the same thing across brands.
- Measure hip circumference. Wrap the tape around the body where the backpack belt will sit, centered over the iliac crest rather than at the natural waist. Record the number over a thin base layer and again over bulky winter layers if that is how the pack will be used.
- Check the overlap range. Look at the pack’s stated torso range and hip-belt range together. If your torso is at the top or bottom edge of a range, plan to try both adjacent sizes with weight in the pack.
What to do when you land between sizes
Borderline sizing is common. If your torso length sits between two torso sizes, try both with the same test load and focus on where the hip belt lands and whether the shoulder straps wrap cleanly without a large gap or hard pressure point.
When torso and hip size conflict, use this order. First, get the torso length right so the shoulder straps and load lifters sit where they should. Second, solve the hip issue with an available belt size, a women’s-specific or men’s-specific harness shape, or another model with more belt adjustment.
Say your torso falls into medium, but your hips need a small belt to wrap firmly. A medium pack with a replaceable small belt often works better than dropping to a small torso, because a too-short pack can push weight into the shoulders and lower back.
How should a hiking backpack fit your body?
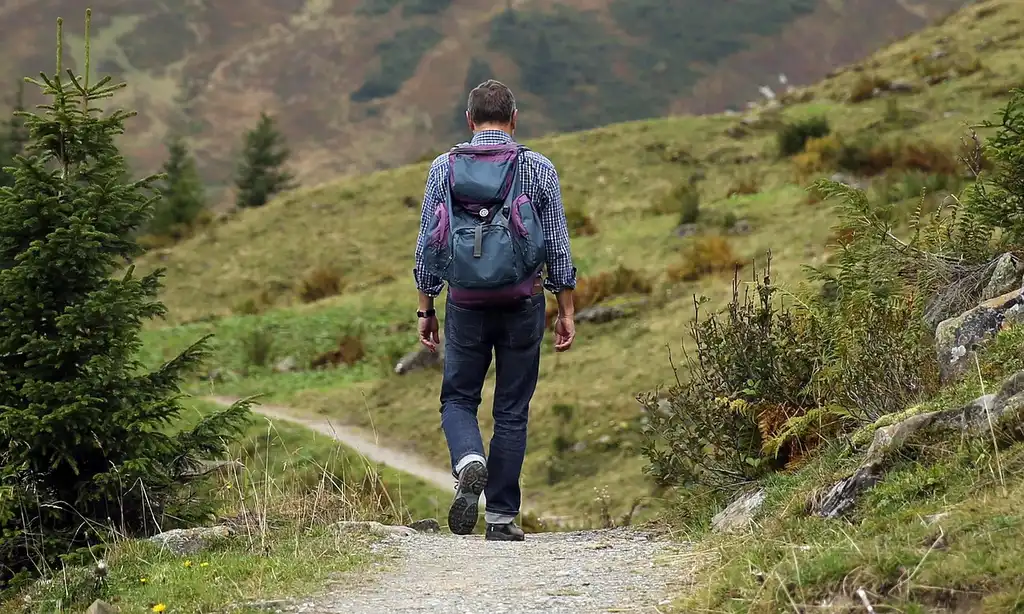
A hiking backpack fits correctly when the center of the padded hip belt sits over the iliac crest, the belt takes most of the weight without sliding, and the shoulder straps make even contact without pinching the neck or leaving a gap near the upper chest. Load lifters should angle back from the tops of the shoulders and pull the load inward, and the sternum strap should steady the shoulder straps without pressing on the chest or limiting breathing.
Hip-belt position, wrap, and load transfer
Place the middle of the padded belt over the iliac crest. Tighten it enough that the pack does not slide down when you relax your shoulders, but not so tight that it creates numbness, bruising, or rib pressure.
Most of the pack’s weight should rest on the hips, especially as the load gets heavier. On a loaded overnight or multi-day pack, if loosening the shoulder straps slightly makes the pack drop sharply, the belt is not carrying enough.
Women’s-specific and men’s-specific packs often differ here more than anywhere else. Belt angle, padding shape, buckle size, and strap geometry can fit certain hip structures better, but the label is still only a starting point.
Shoulder straps, sternum strap, and load lifters
Shoulder straps should contact the body smoothly from the top of the shoulder down the front of the chest, without a major gap near the collarbone and without digging into the neck. Curved strap shapes can help hikers with narrower shoulders, a fuller chest, or more pronounced shoulder slope.
Load lifters are the short straps running from the top of the shoulder straps back to the pack. They help pull weight closer to the upper back, but only if the pack’s torso length is already correct. They do not fix a pack that is too short or too tall.
The sternum strap should sit at a height that keeps the shoulder straps from drifting outward without pressing on the upper chest. Tightening it too far can restrict breathing and push the shoulder straps inward against soft tissue.
Fit red flags: slipping, digging, sway, and top-heavy carry
- Hip belt slides downward within a few minutes of walking.
- Shoulder straps leave a large gap or cut into the neck.
- Collarbone or rib pressure appears before the hips feel loaded.
- Lower-back pressure builds under the lumbar pad.
- The pack sways side to side on uneven ground.
- The load feels tall and tippy because the pack is partly filled above the shoulders.
A common first-timer mistake is tightening the shoulder straps first and cinching the sternum strap hard to stop sway. That often hides a loose hip belt and the wrong torso size for a few minutes, then turns into shoulder pain and collarbone pressure.
What capacity backpack do you need for your trips?
Choose volume by trip length and by the bulk of your gear, not by trip length alone. For most hikers, 20–30 liters covers day hikes, 30–50 liters covers overnight or weekend trips, 50–70 liters covers multi-day loads, and 70 liters or more suits extended trips or unusually bulky gear. Cold-weather insulation, bear canisters, and less compact sleeping gear can move you up a class fast.
20–30 liters for day hikes
This range fits water, layers, food, a small first-aid kit, rain gear, and navigation tools for most day hikes. In hot climates, a reservoir sleeve, accessible bottle pockets, and backpanel ventilation matter more than extra pockets.
If winter layers, snow traction, or camera gear are part of the plan, 30 liters can still be day-hike size without being oversized.
30–50 liters for overnight and weekend trips
This is the broadest category because gear bulk varies so much. A compact sleeping bag, small shelter, and low-bulk stove setup may fit closer to 35 liters. A synthetic sleeping bag, larger tent share, and extra clothing can push the same trip toward 45 or 50 liters.
50–70 liters for multi-day trips
This range suits most multi-day backpacking loads, especially when food volume climbs. Internal frames dominate here because they balance stability, body-hugging carry, and decent freedom of movement.
Picture a five-day trip with a bear canister and cool-night insulation. Even if the gear is fairly light, the canister takes fixed space and often demands a pack body around the mid-50-liter range or larger for clean packing.
70 liters and up for extended trips and bulky gear
Go this large for long food carries, winter systems, mountaineering layers, or group gear that does not compress well. Bigger is not better if half the volume stays empty or gets filled high above the shoulders. Extra capacity often becomes extra pull away from the back.
How do frame type and load profile affect your choice?
Frame choice depends on how much weight you carry, how compact that load is, and how stable you need the pack to feel on uneven ground. Internal-frame packs suit most hikers because they handle moderate to heavy loads with good balance. External-frame packs carry heavy or awkward loads well, while frameless packs work best only with light, compact kits.
Internal-frame packs for most hikers
Internal frames keep weight close to the body and move well on rough trail, steep climbs, and scrambling. They are the default choice for overnight and multi-day hiking because they transfer load to the hips without sticking far behind the back.
Backpanel designs vary. Trampoline mesh and suspended panels improve airflow but can move the load slightly farther from the back. Foam channels hug the body better and usually feel more stable, though they trap more heat.
External-frame packs for heavy or awkward loads
External frames still make sense for very heavy carries, bulky gear, and loads with odd shapes. They can offer excellent ventilation and strong load transfer, but they are less streamlined in brush, scrambling, and narrow terrain.
Frameless packs for light, compact kits
Frameless packs save empty weight, but they rely on careful packing and a low total load. Once load weight climbs, many hikers feel more shoulder strain and less structure through the hip belt unless the pack is designed for a specific narrow range.
How empty pack weight fits into the decision
Empty weight matters in context. Frameless packs are usually lightest, internal-frame packs sit in the middle, and heavy-duty internals or externals weigh more because they carry more. As a practical buying rule, lighter is only better if the pack still supports the load you will actually carry.
Most manufacturers list recommended load ranges. Stay inside them. A heavier pack that carries 35 pounds well can be the better choice over a lighter pack that becomes unstable above 20.
Which features actually matter for your hiking style?
Features matter when they solve a carrying problem in your conditions. Ventilated backpanels help in heat, compression straps control half-full loads and side-to-side movement, hydration access matters on long or hot hikes, and shape-specific strap designs can fix fit issues that torso size alone does not solve. Skip features that add weight without helping your usual terrain, climate, or packing style.
Backpanel ventilation for hot weather
Mesh trampoline backs and suspended panels create an air gap that can reduce sweat buildup in hot weather. The tradeoff is that they often hold the load slightly farther from your back, which can reduce stability under heavier loads.
Foam channels and molded backpanels ventilate less but keep the pack tighter to the body. For scrambling or uneven terrain, that closer carry often matters more than maximum airflow.
Compression straps for load control
Compression straps matter most when the pack is not full. They shrink dead space, reduce slosh, and steady side-to-side movement. Side compression also helps secure tall bottle pockets and keeps tent poles or foam pads from shifting outward.
Hydration sleeves and bottle-pocket access
A reservoir sleeve and hose port are most useful for day hikes, warm climates, and hikers who drink frequently without stopping. Bottle pockets matter just as much. The best pocket is the one you can reach while wearing the pack or that holds bottles securely when you cannot.
Shape-specific harness options, including women-specific fits
Women’s-specific packs often offer shorter torso options, more curved shoulder straps, narrower harness geometry, and belts shaped for different hip contours. Those features can also fit many people shopping outside the label.
Body shape often matters more than men’s, women’s, or unisex branding. Shoulder slope, chest shape, and whether the hips are more shelf-like or straighter can change whether the strap shape gaps, rubs, or stays planted.
Backpack fit decision table
| Torso length | Hip circumference at belt line | Hiking style and trip length | Recommended volume | Frame type | Key features | Red flags |
|---|---|---|---|---|---|---|
| 15–17 in | 28–34 in | Day hiking, fast moving, hot weather | 20–25L | Light internal frame or frameless if load stays low | Short torso option, curved straps if needed, bottle access, ventilated backpanel, side compression | Shoulder strap gap at chest, belt cannot cinch small enough, load bouncing on descents |
| 16–19 in | 30–38 in | Day hiking with extra layers or camera kit | 25–30L | Internal frame | Foam-channel or suspended backpanel, sternum strap height adjustment, trekking-pole carry | Top-heavy feel from overstuffing a small pack, rib pressure from over-tight sternum strap |
| 16–19 in | 30–40 in | Overnight or weekend, compact gear | 30–40L | Internal frame | Supportive hip belt, load lifters, compression straps, reservoir sleeve | Belt slips when weight rises, collarbone pressure if torso is too short, sway when half full |
| 18–21 in | 34–42 in | Weekend with bulkier sleep system | 40–50L | Internal frame | Larger hip-belt range, sleeping-bag compartment if preferred, strong side compression | Lower-back hot spot from short torso, shoulder digging from belt riding too low |
| 18–21 in | 32–44 in | Multi-day backpacking, typical three-season load | 50–65L | Internal frame | Load lifters, firm frame sheet or stays, hip-belt pockets, bear-canister-friendly shape | Top-heavy carry from oversized volume, load lifters lying flat because torso is wrong |
| 19–23 in | 34–46 in | Extended trips, winter loads, long food carries | 65–75L+ | Supportive internal frame or external frame for awkward loads | High load rating, broad belt padding, compression straps top and side, ice-tool or snow carry | Hip bruising from narrow belt, backward pull from deep pack body, unstable carry above shoulder height |
| Any borderline torso | Any hip size at edge of belt range | Any trip where torso and belt size conflict | Match trip need, not larger by default | Usually internal frame with interchangeable belt if offered | Try adjacent torso sizes with identical load, check belt wrap and strap contact, consider women’s-specific or unisex alternatives | Choosing smaller torso just to tighten the belt, or larger volume to “make it work” |
Can you use a travel backpack for hiking?
A travel backpack can work for short, easy hikes with light loads, but it usually falls short once distance, elevation, heat, or carry weight increase. Most travel packs put less weight on the hips, ventilate poorly, and lack the strap geometry and compression needed for uneven terrain. If your shoulders take the load or the pack sways on trail, a true hiking pack is the better tool.
When a travel pack can work
A lightly loaded travel pack can handle a short walk to a viewpoint, a city-adjacent trail, or a simple day hike where water, snacks, and a shell are the only cargo. The shorter and smoother the route, the less its harness limitations matter.
Where travel packs usually fall short on trail
Travel packs often have boxier shapes, flatter backpanels, and belts that stabilize rather than transfer load. Bottle access may be poor, ventilation limited, and compression straps minimal. On uneven trail, that usually means more sway and more shoulder work.
Signs you need a true hiking harness and hip belt
If the load hangs from the shoulders, if the belt rides on the waist instead of the iliac crest, or if the pack pulls backward on descents, the harness is wrong for hiking. A pack built for trail movement should stay close, stable, and hip-supported.
How to try on a pack and spot bad fit fast
Use a weighted fit check
- Load the pack. Put in weight close to what you expect to carry, using water bottles, bags of food, or store test weights. A realistic load changes how the frame, belt, and shoulder straps sit.
- Loosen all straps. Start with the hip belt, shoulder straps, load lifters, and sternum strap loose. This shows whether the pack’s base geometry fits rather than masking problems with over-tight adjustments.
- Center the hip belt. Put the midpoint of the padded belt directly over the top of your hip bones, then tighten until the padding grips evenly around the iliac crest. The buckle should center comfortably, and the padding should wrap without large gaps at the front or back.
- Tighten shoulder straps. Snug them until they make close contact without pulling major weight off the hips. Watch for digging near the neck, gapping at the upper chest, or hard pressure on the collarbones.
- Set load lifters. Tighten only enough to draw the upper pack closer. If they cannot create a useful backward angle from the shoulder tops, the torso size may be wrong.
- Adjust sternum strap. Slide it to a comfortable height and tighten lightly so the straps stay centered. You should still breathe deeply without chest pressure.
- Walk and climb. Move for at least several minutes, including stairs or a ramp if possible. Pay attention to belt slip, side sway, top-heavy feeling, lower-back pressure, and whether loosening the shoulders slightly leaves the pack supported by the hips.
What a quick bad-fit check catches
You can reject many packs fast. If the belt will not stay on the iliac crest, if the shoulder straps cannot lie flat, if the sternum strap must be overtightened to stop drift, or if the pack feels tall and unstable half full, move on.
Frequently asked questions
How do I choose the right size hiking backpack?
Choose size in two parts: torso size first, then pack volume. Measure from C7 to the iliac crest line to match the pack’s torso range, and measure hip circumference where the belt sits. Then match capacity to your actual gear: 20–30L day hiking, 30–50L overnight, 50–70L multi-day.
How should a hiking backpack fit my torso?
The pack’s torso length should put the hip belt over the iliac crest while letting the shoulder straps follow the curve of your shoulders without major gaps or digging. Load lifters should angle back from the shoulder tops and pull weight inward. If the belt rides low or the straps crush the collarbones, torso size is off.
How tight should a hiking backpack hip belt be?
The hip belt should be tight enough that the pack stays planted on the iliac crest and carries most of the load when your shoulders relax. It should not cause numbness, bruising, or rib pressure. If you must overtighten it to stop slipping, the belt shape or size is wrong.
What is the difference between men’s and women’s hiking backpacks?
Women’s-specific packs often offer shorter torso options, narrower harness geometry, more curved shoulder straps, and differently shaped hip belts. Those features can help many body shapes, but the label is not a rule. Shoulder slope, chest shape, and hip structure matter more than the marketing category alone.
Should I buy a hiking backpack with a frame?
Most hikers should. Internal-frame packs are the best fit for most day-hike, overnight, and multi-day use because they steady moderate to heavy loads and transfer weight to the hips. Go frameless only if your kit is compact and light. Choose external frame only for especially heavy or awkward loads.
How do I know if a backpack is too big for me?
A backpack is too big if the torso length prevents the hip belt from centering on the iliac crest, if the load sits high and tippy, or if the shoulder straps and load lifters never line up correctly. It can also be too big in volume if half-full packing creates sway and pushes gear above shoulder level.