What to pack in a hiking backpack for a day hike

Pack one liter of water per 2 hours, food, navigation, sun protection, insulation, a light first-aid kit, headlamp, and a charged phone. Leave out extras unless distance, weather, or remoteness makes them necessary. This guide shows what to pack, where to put it in your hiking backpack, and what to trim for short, hot, cold, or uncertain hikes.
What is a daypack?
A daypack is typically a small backpack for day hikes and other short outings. For day hiking, that usually means lighter loads and simpler gear than a backpacking pack, which is built for overnight food, shelter, and sleep systems.
Fit matters before volume. A pack that sits wrong on your torso or drags from the shoulders will feel heavy fast, even if it is small. Look for padded shoulder straps, a shape that matches your torso length, and women’s or men’s fit options when they help the harness sit better.
Day-hike backpack basics
Pack size should match the gear you actually need on the trail. Gregory’s day hiking backpack range starts at 14 liters and goes up to 28 liters, while The North Face calls a smaller daypack like the Trail Lite 36L ideal for a day trip and recommends a Trail Lite 50L for multi-day excursions.
That size gap matters. A daypack is meant for short hikes and lighter loads, so a smaller pack usually works when the route is simple and the weather is steady. Choose the lightest pack that still carries water, layers, food, and safety items without forcing you to overstuff it.
Comfort features matter most when the trail tilts uphill. Gregory describes its day hiking packs as built for shorter adventures and longer day trips, and says they are designed to reduce fatigue and improve load balance. The North Face lists side water bottle pockets and quick-draw smartphone access as hiking pack features, and notes that some packs include laptop sleeves.
A fully loaded hiking backpack should not exceed 10% of your body weight for day use. That is a rough target, not a hard stop. Water needs, heat, and distance from refill points can push the safe load higher, so comfort and stability should decide the final load.
What to pack for a day hike?
Start with the items that keep the hike safe and manageable: water, food, a weather layer, navigation tools, a first-aid kit, a headlamp, and a whistle. Add only what the hike demands, then trim duplicate gear, bulky extras, and anything that does not change safety or comfort.
Water and hydration system
Bring enough water for the hike length, heat, effort, and distance from refill points. A common starting point is about one liter per 2 hours, then adjust upward for hot weather, steep climbs, or long stretches without water. Use bottles or a reservoir, and keep the first drink easy to reach.
Food and snacks
Pack food you can eat without fuss: trail snacks, a packed lunch, or other high-calorie, easy-to-eat options. Put the first snacks where you can reach them quickly, since a low-energy hike gets harder to manage if food is buried under spare layers.
Weather layer
A packable rain jacket or waterproof shell is commonly recommended for a day-hike pack. Weather changes quickly on exposed ridges and shaded trails alike. A light insulating layer helps on cold starts, windy summits, and stops where body heat drops fast.
Navigation tools
Carry a map and compass or a phone with GPS, and keep a backup if batteries fail. The device needs to be reachable quickly, not packed under sleeping-style bulk. A charged phone helps, but it does not replace a paper map when the route is unclear or the battery drains.
Safety kit
Bring a small first-aid kit, a headlamp or torch, an emergency whistle, and basic repair items. These are short, light, and easy to justify. A headlamp belongs in the pack even when you expect daylight, because delays, detours, and slower return times happen.
Packing matrix
This matrix turns the checklist into a packing order. It shows what each item does, where it should go, and what to add or drop for different day-hike scenarios. Do not treat the “leave at home” column as permission to skip safety basics.
| Item | Why it matters | Where it should go in the backpack | Hot-weather variant | Cold-weather variant | Remote-trail variant | Leave at home |
|---|---|---|---|---|---|---|
| Water bottles or reservoir | Prevents dehydration and supports steady pace | Side pocket or hydration sleeve; keep one bottle easy to reach | Carry extra water for heat and sweat loss | Carry enough for slower pace and dry air | Add more water if refill points are uncertain | Never leave out |
| Trail food or lunch | Maintains energy and decision-making | Top or middle for easy reach at breaks | Choose snacks that are easy to eat in heat | Pack enough calories for longer stops | Bring a little extra in case the route runs long | Extra treats and duplicate snacks |
| Rain jacket or waterproof shell | Protects against wind and sudden rain | Top of pack or outer pocket | Use a lighter, packable shell | Pair with an insulating layer | Keep it accessible if conditions shift fast | Bulky spare outerwear |
| Insulating layer | Helps if temperature drops or pace slows | Bottom or middle, inside a dry bag if needed | Often a thin layer is enough | Bring a warmer layer for stops and altitude | Add extra warmth if the route is exposed | Second backup jacket if one layer will do |
| Map and compass or phone/GPS | Prevents getting turned around | Top pocket, hip belt pocket, or outer pocket | Keep phone shaded and charged | Protect batteries from cold | Carry paper backup and know the route | Secondary gadget if you already have a backup |
| First-aid kit | Handles blisters, cuts, and minor injuries | Middle of pack in a small pouch | Include blister care for hot spots | Add hand warmers or extra bandaging as needed | Bring a slightly fuller kit | Large duplicate medicine supply |
| Headlamp or torch | Helps if the hike runs late | Top pocket or hip belt pocket | Still pack it | Carry with spare batteries if your model uses them | Keep it easy to find | Never leave out |
| Emergency whistle | Signals for help without using much energy | Hip belt, shoulder strap, or top pocket | Still pack it | Still pack it | Keep it on-body or very easy to grab | Never leave out |
| Small repair items | Fixes loose straps or minor pack issues | Middle pocket or repair pouch | One compact kit is enough | Bring what your gear needs, no more | Include a small patch or tape option | Bulky tool rolls and duplicates |
| Sun protection | Reduces heat stress and skin exposure | Top pocket or side pocket | Make it easy to reach | Still useful at altitude and on reflective snow | Carry it even if the trail seems shaded | Extra cosmetic items |
A common example is a 5-mile route on a hot ridge with no reliable water after the trailhead. The load should lean toward extra water, a lighter lunch, and easy-access snacks, while a spare fleece may be left at home. The pack still needs the same safety basics.
A common first-timer mistake is packing a roomy 28L daypack as if it were an overnight bag. That usually adds duplicate clothes, a second knife, or bulky gadgets that never leave the pack, while the items needed most sit too deep to reach quickly.
How do you pack a hiking backpack?
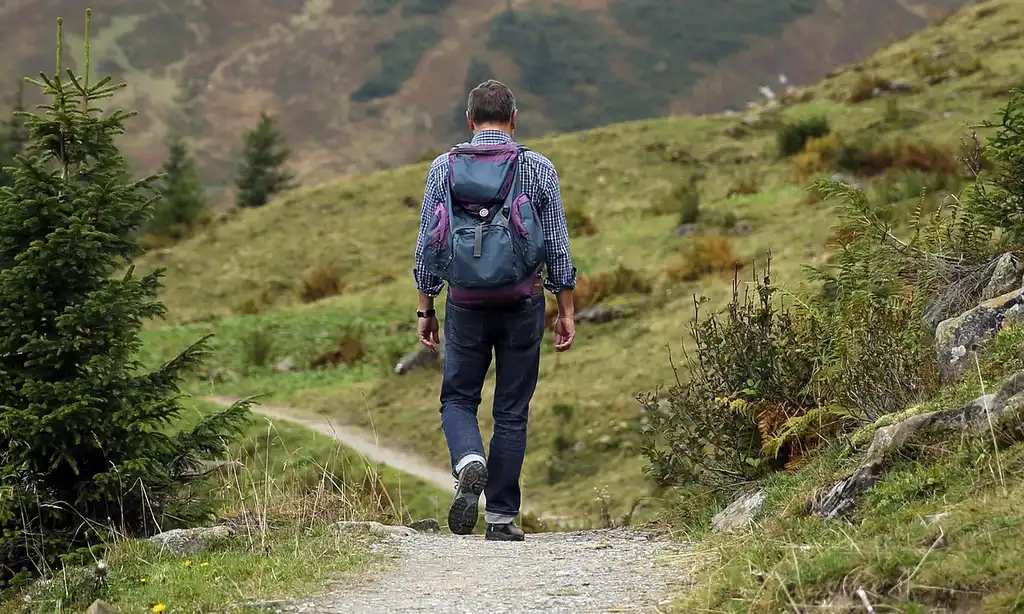
Pack by access and balance. Put dense items close to your back, keep the lightest bulky items away from the load center, and leave the things you will need during the hike where you can reach them without unloading the pack. That order helps comfort and stability.
- Place the heaviest compact items in the middle, close to your back.
- Put the insulating layer and extra food above or around that core.
- Stash the rain shell where you can grab it fast.
- Keep water in side pockets or a hydration sleeve.
- Use hip belt pockets or an outer pocket for snacks, whistle, and navigation.
- Leave the bottom for items that are light, bulky, and least likely to be needed first.
Bottom of the pack
The bottom works best for items you will not need until camp-style stops, which on a day hike usually means light, soft, or backup pieces. If the route calls for an insulating layer, a compact dry bag or extra socks can sit here. Do not bury your lunch or rain shell at the very bottom if weather can change quickly.
Middle of the pack
Put the densest items in the middle and close to your back. That keeps the pack stable and reduces pulling on your shoulders. A first-aid kit, food pouch, and compact repair kit fit well here because they are small enough to stack and heavy enough to benefit from central placement.
Top of the pack
The top is for items you may need during a stop or a sudden shift in weather. A rain jacket, snack pouch, map, and headlamp belong here. If the forecast is uncertain, the top section should hold the first layer you would want when the wind picks up.
Side pockets and hip belt
Use side pockets for water bottles and a hip belt pocket for snacks, a phone, or a whistle if the pack has one. The goal is quick access without stopping. The North Face specifically lists side water bottle pockets and quick-draw smartphone access, which matches the way day hikers actually use a pack.
What should change for hot, cold, or remote hikes?
Change the load by risk, not by habit. Hot hikes need more water and easier access to food and sun protection. Cold hikes need insulation and more careful battery care. Remote trails need stronger navigation backup and a slightly fuller safety kit.
Hot-weather packing priorities
Heat changes the water calculation first. Start with one liter per 2 hours, then add more if the climb is steep or the route has no refill points. Keep snacks, sunscreen, and water in easy-reach pockets so you do not slow down every time you need a drink or a break.
Cold-weather packing priorities
Cold hikes can feel short, but stops get uncomfortable fast. Add an insulating layer, protect your phone battery, and keep gloves or other small warmth items where they will not get buried. If the route is exposed, the shell and insulation should be near the top, not at the bottom.
Remote-trail packing priorities
On remote trails, carry map and compass plus a charged phone or GPS, and add a stronger backup plan for navigation. Bring a fuller first-aid kit, a headlamp, an emergency whistle, and enough water to avoid relying on unknown sources. The farther you are from help, the less sense it makes to trim safety gear.
How much should your day pack weigh?
A day hiking load should usually stay under 10% of your body weight, but that figure is only a guide. Water is the main reason a good day pack can run heavier than expected, especially in heat or on long routes. Stability and comfort matter more than chasing an exact number.
Do not add a larger pack just to hold extra gear. If the load is creeping up, cut duplicate clothing, oversized food containers, and tools you will not use. A smaller pack often prevents overpacking because every item has to earn its place.
Say your hike is 3 hours on a warm trail with no water source. A small pack can still be the right choice, but the water load will be larger than on a cool walk. The fix is not a bigger gear pile; it is a tighter list and better placement of the items you already need.
Signs the load is too heavy include shoulder strap pressure, a pack that pulls backward, and a pace that drops because the pack feels unstable on climbs. If that happens, move dense items closer to your back, remove duplicates, and trim anything that does not affect safety, weather protection, or navigation.
Frequently asked questions
What do I need in a day pack for hiking?
At minimum, pack water, food, a weather layer, navigation tools, a first-aid kit, a headlamp, and an emergency whistle. Add sun protection and small repair items as needed. If the route is longer, hotter, colder, or more remote, increase water and add insulation or backup navigation before adding comfort items.
What size backpack is best for a day hike?
Most day hikers fit well in a pack that holds only what the route demands. Gregory’s day hiking range starts at 14 liters and goes up to 28 liters, and The North Face points to a smaller daypack like the Trail Lite 36L for a day trip. Fit matters as much as volume.
How do I pack for a day hike?
Put heavy items close to your back and in the middle, light bulky pieces low or around them, and quick-access gear near the top or in pockets. Water belongs in side pockets or a hydration sleeve. Snacks, map, phone, whistle, and headlamp should be easy to reach without unpacking the bag.
How much weight should a hiking backpack carry?
A fully loaded hiking backpack should not exceed 10% of your body weight for day use. Treat that as a target, not a rule that overrides common sense. If water, weather, or remoteness pushes the load higher, remove non-essentials and keep the pack stable rather than chasing a strict number.
What should I bring in case the weather changes on a day hike?
Bring a packable rain jacket or waterproof shell and, when temperatures may drop, a light insulating layer. Put the shell where you can reach it fast. If the hike is exposed or the forecast is uncertain, keep the extra layer high in the pack so you can stop and adjust quickly.
How do I properly pack a hiking backpack?
Start with the items that matter least for immediate access, then build toward the gear you need most often. Keep water handy, centralize dense items, and place food, navigation, and safety items where you can reach them fast. Good packing reduces fatigue and keeps the load from shifting on the trail.