How to clean burnt camp cookware without scratching

Soak the pan first, then scrub with a non-scratch tool and baking soda paste. Use metal only on bare cast iron, and only when needed. Scrubbing the wrong way can strip seasoning, haze nonstick coatings, or leave deep scratches that hold food and rust. This guide shows which cleaner, soak, and tool to use for burnt residue on cast iron, stainless steel, aluminum, enamel, and nonstick camp cookware.
Before you scrub
Identify the burn type and cookware material before you choose a cleaner. Burnt sugar, dairy scorch, oil carbon, and soot each need a different approach, and enamel, stainless steel, cast iron, and non-stick all have different limits. Set your stop point first: if the surface starts to scratch, chip, or lose its coating or seasoning, stop.
What you’ll need
- Microfiber cloth for gentle wiping on scratch-prone surfaces
- Non-abrasive sponge or pad for light scrubbing
- Soft-bristle scrub brush for stuck-on spots
- Baking soda for paste or soak cleaning
- White vinegar for durable metal cookware
- Lemon juice for mild acid cleaning or deodorizing
- Salt for jam, caramelized spots, or a light scrub
- Mild detergent or washing powder for greasy burn layers
- Clean water for rinsing and final wipe-down
Which cleaner should you use?
Start with baking soda for most burnt residue because it softens and lifts without aggressive abrasion. Move to vinegar on stainless steel and other sturdy metal pans when residue stays put, and use salt for sticky sugar burns or caramelized patches. For greasy, carbon-like layers, a detergent soak is often the better first step.
Use baking soda for softened residue
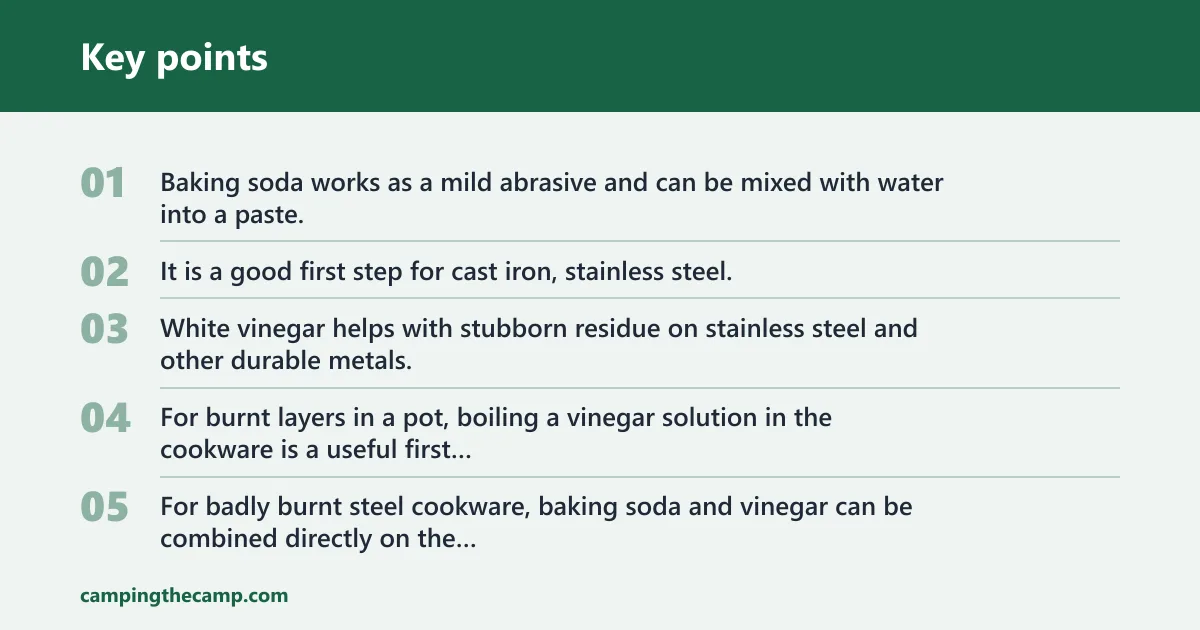
Baking soda works as a mild abrasive and can be mixed with water into a paste. It is a good first step for cast iron, stainless steel, and many enamel pans when the burn layer is thin or mixed with cooked-on food.
Use vinegar on durable metal cookware
White vinegar helps with stubborn residue on stainless steel and other durable metals. For burnt layers in a pot, boiling a vinegar solution in the cookware is a useful first move. For badly burnt steel cookware, baking soda and vinegar can be combined directly on the surface.
Use salt for sticky spots
Salt works best as a gentle scrub or compress when the residue is sugary and tacky. It is especially useful for burnt jam or marmalade. A salt compress may need several hours before the residue softens enough to wipe away.
Use detergent soaks for greasy burn layers
Mild detergent or washing powder can help with oil carbon and other greasy layers, especially in camp cookware that needs low-water cleanup. Check the cookware material first. Coated pans and delicate enamel need gentler handling than bare stainless steel.
How do you clean burnt cookware step by step?
Cool the cookware fully, then use the least aggressive method that matches the burn and finish. Start with a soak, switch to a paste or acid wash if needed, and stop as soon as the residue releases. Rinse thoroughly and dry the cookware right away so rust, streaks, and mineral film do not set in.
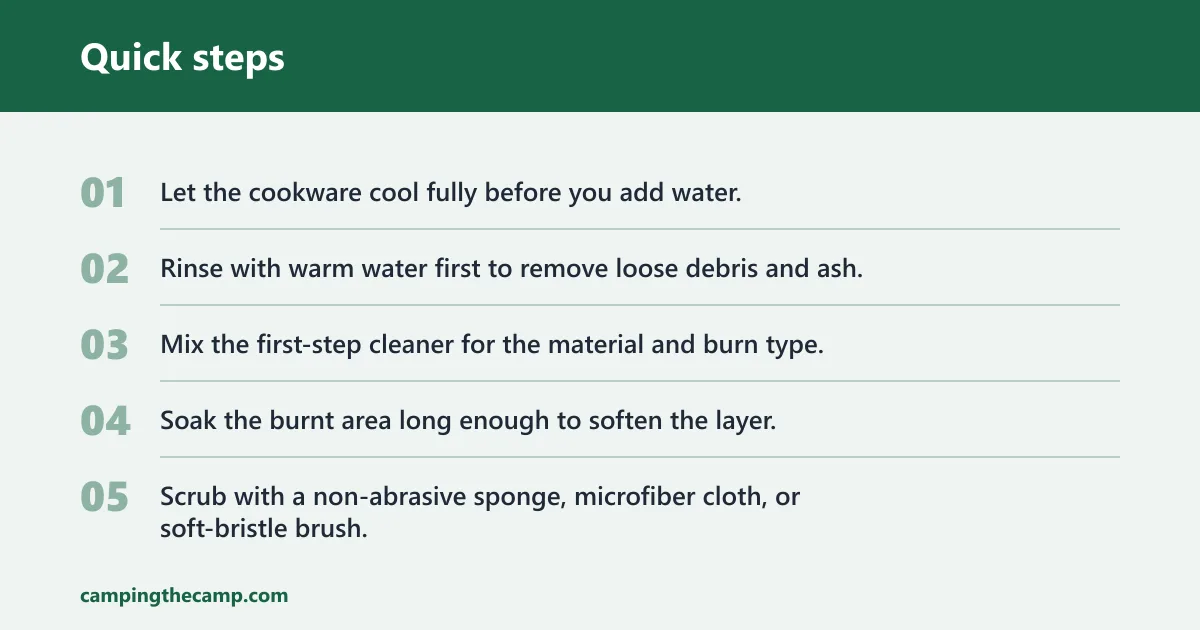
- Let the cookware cool fully before you add water.
- Rinse with warm water first to remove loose debris and ash.
- Mix the first-step cleaner for the material and burn type.
- Soak the burnt area long enough to soften the layer.
- Scrub with a non-abrasive sponge, microfiber cloth, or soft-bristle brush.
- Add more paste or liquid in measured increments if the residue remains. For paste, add 1 tablespoon at a time, then recheck.
- Rinse clean, dry fully, and inspect the surface before storing or cooking again.
1. Cool the cookware fully
Do not shock enamel with cold water while it is hot. Sudden temperature change can stress the finish, and hot metal also makes burnt sugar and oil smear harder instead of releasing cleanly.
2. Soak the burnt area
Use the smallest soak that will cover the residue. On enamel, a baking soda solution of 5–6 tablespoons per liter of water can help with burnt pots. Simmer that mix for 30–40 minutes before wiping softened residue.
3. Apply a paste or acid wash
For durable metal, switch to vinegar if the first soak stalls. A 50% distilled water and 50% white vinegar mixture is a useful cleaning blend for grime on surfaces that can handle acid. On badly burnt steel, baking soda and vinegar can be applied together, then left to work before a gentle scrub.
4. Wipe, rinse, and repeat if needed
Use a microfiber cloth for final wiping on scratch-prone surfaces. If residue remains, repeat the same method once before moving to a stronger one. A common first-timer mistake is switching straight to a harsher tool; that often causes more damage than the burn itself.
Burnt cookware decision table
Use this table to match the burn type and cookware finish before you touch the surface. If a cell tells you to stop, that means switch methods, not force the current one harder.
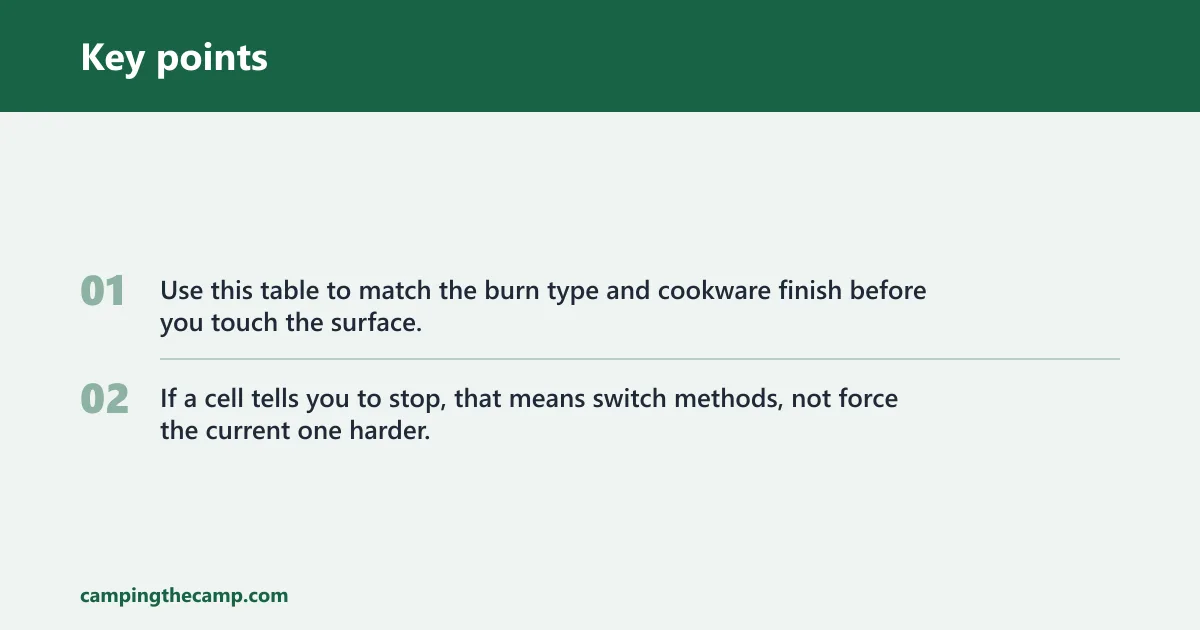
| Burn type | Stainless steel | Cast iron | Enamel | Non-stick |
|---|---|---|---|---|
| Sugar | First step: simmer water with baking soda, then add vinegar if needed. Tools: non-abrasive pad, microfiber cloth. Soak: 15–30 minutes. Stop if the finish dulls badly. | First step: warm water soak only, then salt compress if sticky. Tools: soft brush, cloth. Soak: short soaks only. Stop if seasoning lifts; re-season instead of pushing harder. | First step: baking soda solution of 5–6 tablespoons per liter; simmer 30–40 minutes. Tools: soft sponge. Soak: 30–40 minutes. Stop if chips or craze lines appear. | First step: warm water and mild detergent. Tools: soft sponge only. Soak: brief soak. Stop if the coating starts to haze or peel. |
| Dairy | First step: a vinegar simmer is commonly used first, then baking soda paste; a typical soak is about 15–20 minutes. Tools: non-abrasive pad. Soak: 15–20 minutes. Stop if the stain turns gray but will not lift; repeat once only. | First step: warm water soak, then a small amount of detergent. Tools: soft brush. Soak: short. Stop if rust blooms after rinsing; dry at once. | First step: a baking soda solution is commonly used, then a gentle wipe; a typical soak is about 30–40 minutes. Tools: sponge only. Soak: 30–40 minutes. Stop if the enamel feels rough or flakes. | First step: detergent soak; avoid acid-heavy scrubs. Tools: soft sponge. Soak: brief. Stop if the base coat looks damaged. |
| Oil carbon | First step: a vinegar solution is commonly used first, then scrub with baking soda paste; a typical soak is about 20–30 minutes. Tools: non-abrasive pad, soft brush. Soak: 20–30 minutes. Stop if the steel shows heat tint only; polish later. | First step: dry rub with salt or a light detergent wash, then re-oil after drying. Tools: cloth, soft brush. Soak: avoid long soaks. Stop if seasoning thins. | First step: a baking soda solution is commonly used; a typical soak is about 30–40 minutes. Tools: soft sponge. Soak: 30–40 minutes. Stop if the enamel dulls or chips. | First step: mild detergent soak. Tools: soft sponge. Soak: brief. Stop if the coating feels sticky or rough. |
| Soot | First step: damp microfiber cloth, then a vinegar wipe. Tools: cloth, non-abrasive pad. Soak: usually not needed. Stop if soot smears into scratches. | First step: dry wipe, then wash quickly and dry. Tools: cloth, soft brush. Soak: avoid long contact. Stop if rust risk rises. | First step: damp sponge with mild detergent. Tools: soft sponge only. Soak: short. Stop if the surface shows micro-crazing. | First step: microfiber cloth and mild detergent. Tools: soft cloth only. Soak: minimal. Stop if the finish changes color. |
Common mistakes
The biggest damage comes from using the wrong tool or leaving the cookware wet. Scraping with metal tools, using abrasive powders on enamel, soaking cast iron too long, or storing a damp pan all create new problems that were not there before.
Scraping with metal tools
Do not use knives, metal brushes, or steel wool on burnt cookware. Those tools can cut non-stick coatings, scratch polished stainless steel, and damage the sheen that helps food release.
Using abrasive powders on enamel
Enamel is delicate and sensitive to sudden temperature changes. It also does not like abrasive powders. If you need more lift, use a baking soda paste, then a soft sponge or a non-abrasive pad instead.
Soaking cast iron too long
Cast iron should generally not sit in water for hours unless removing a fresh food burn, and it should be dried immediately afterward. Too much water can strip seasoning and leave the surface ready to rust.
Leaving cookware wet after rinsing
Dry everything after the final rinse. Stainless steel can spot, cast iron can rust, and enamel can keep mineral streaks. A microfiber cloth is a safer finishing tool than paper towel or tissue on scratch-prone surfaces.
When should you stop cleaning?
Stop when the surface starts to scratch, when the finish changes, or when the coating has clearly failed. For cast iron, stop if seasoning lifts and plan to re-season. For enamel, stop if chips or dull patches appear. For non-stick, stop if the coating looks damaged or flakes.
Stop when the surface starts to scratch
A scratch is a signal to step back, not scrub harder. Switch to a softer tool, shorten the soak, or accept a faint stain if the pan still cooks well. Cooking performance matters more than a perfect look.
Stop if seasoning lifts from cast iron
When cast iron loses its seasoning, cleaning pressure can make the pan cook worse. Dry it fully, heat it briefly to help drive off moisture, then re-season before the next use.
Stop if enamel chips or dulls
Chips expose the base metal and can change how the pan heats. If the enamel chips, set the pan aside for light-duty use only, or replace it if the damage is in the cooking zone.
Stop if a non-stick coating looks damaged
If the surface is worn through, sticky, or peeling, do not keep scrubbing. Non-stick cookware should not be treated like bare metal. A damaged coating is a reason to retire the pan.
Frequently asked questions
How to clean burnt pan
Start with warm water, then use baking soda paste and a non-abrasive sponge. If the pan is stainless steel, a vinegar simmer can help. If it is cast iron, keep the soak short and dry it fully afterward so the seasoning does not break down.
How to clean burnt non stick pan
Use warm water, mild detergent, and a soft sponge only. Avoid abrasives, metal tools, and heavy scrubbing because they can damage the coating. If residue will not lift, stop and accept a light stain rather than wearing through the non-stick surface.
How to clean burnt food off pan
Soften the burnt food first, then wipe it away with a microfiber cloth or non-abrasive pad. A lemon juice rinse or a baking soda paste can help with smell and residue. If the pan is cast iron, dry it immediately and re-oil the surface lightly.